
Review: The CZUR ET Series book scanner is much better than doing it yourself
Over the last few years, we’ve covered many intriguing solutions for quickly and nondestructively scanning two-page books. There have been expensive models like the $5,699 BookDrive DIY or the PlusTek OpticBook, or less costly do-it-yourself models like Daniel Reetz’s $300 two-camera cradle, the $200 BookLiberator, or this metal tie-rod frame that just costs $20 plus the cost of a camera. But what these have in common is that they either cost a fortune in money, or cost a great deal of time and effort in assembly. Has the time come for a scanner that is both cheap and easy?
I’ve been spending the last few weeks playing around, off and on, with the $399 Czur book scanner that David covered a number of times on the old site. First, I had the model that David had used and sent me, then Czur themselves sent me a whole new version of it. (The new version appeared to be exactly the same model as the older one, which I’d already set up, so I left it in the box—but I did use the foot pedal that came with it on the one I already had.)
While I haven’t done a whole lot of heavy scanning with it, I have converted a couple of short stories from Astounding: The John W. Campbell Memorial Anthology to digital format, which has given me an appreciation for what it’s like to work with. On the whole, I’m very favorably impressed. The Czur isn’t a magic funnel that you drop a paper book into at the top and hold your Kindle underneath to catch the ebook that falls out—and we probably won’t ever have anything quite that simple—but it’s a lot closer than a lot of earlier scanning solutions have been.
Not to bury Czur but to praise it
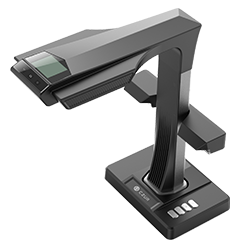
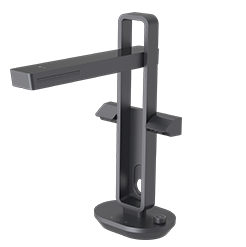
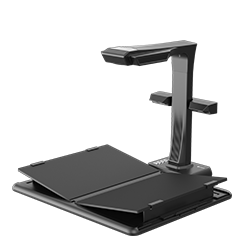
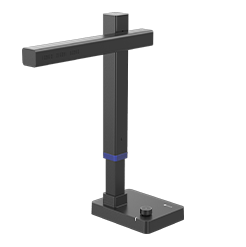
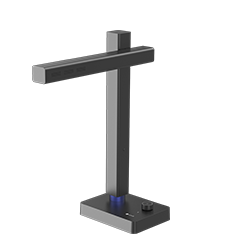
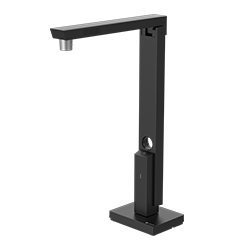
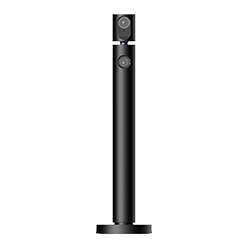
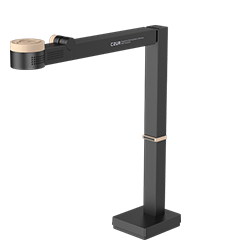
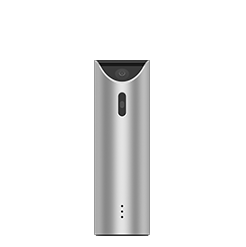
The Czur (pronounced “SEE-zurr”) ET Series scanner is shaped like an upside-down L, similar to some desk lamps. However, instead of just lights, it also has a highly-sensitive digital camera built in, and a small screen on top to watch what you’re doing. The addition of a push-button or foot-pedal remote control means you can manipulate the book with one or both hands and click the shutter whenever you’re ready.
The scanner is relatively simple to set up and use, but its one major flaw is that its software and instructions were clearly written by people who knew Chinese a lot better than they know English. Sometimes the interface is clunky, sometimes the software buttons or menu functions are in broken English, and in some cases there isn’t English documentation at all—the 6-minute instructional video on the scanner’s support page is entirely in Chinese. Fortunately, it was simple enough for someone technically inclined to puzzle out.
 The setup process is pretty simple. The version of the scanner David sent me required a little bit of assembly—I had to screw the top of the “L” onto the post with an included screwdriver. However, the newer model Czur sent along came fully-assembled and packed into a padded box. There are also instructions for downloading and installing the latest firmware versions, which was also easy. After that, it’s just a matter of hooking up the button or foot pedal (there’s only one USB plug for a remote, so you have to choose one or the other) and activating the software.
Using the Czur
There are two ways to use the scanner—either physically connected to a computer by USB or HDMI, or by using a Wi-Fi uplink to upload documents to a Czur cloud account. I’ve tried it both ways, and on the whole prefer using it with a physical USB hookup—the cloud account adds a little extra complexity. But if you don’t have anywhere near your computer to put the scanner, the cloud account means you have the flexibility to use it anywhere, not just where there’s a handy computer.
 If you’re going to hook it directly to your computer, you’ll be using the Czur application that came with it during the scanning process. The application will allow you to use the Czur either as an image-capturing scanner, or as a live visual presenter to throw what’s below the camera up on a bigger screen (like the overhead projectors you’ve seen used in classrooms). The application will show you what the camera currently displays, so you can make sure it’s aligned right before you scan it.
 Once you’ve got the scanner set up, scanning books is simply a matter of turning to the pages in question, then hitting the pedal or button to snap a photo. (For the books I scanned, the pedal worked better, because it let me use both hands to hold the pages flat.) The scanner will paint several horizontal laser lines across the image, which let it calculate and correct for the curvature of the pages, then save the curve-corrected photo. The software allows scanning in black and white, greyscale, seal, or full color. (I’m not sure what “seal” means, but it seems to be a simplified color pallette.) It will also let you switch between scanning open books with curved pages, or scanning flat documents or photos—so you could also use the Czur for scanning ordinary flat paper documents, just as with photocopier-style scanners.
 When scanning books, one thing I learned is that you shouldn’t rush the scan. You should make sure the page is turned and everything’s held still—if the page moves while scanning, you can get some odd image-capturing errors, such as the book scanning diagonally with bits of the page cut off. Also, you should take off any dust jackets that have writing on them that could stick out at the edges and confuse the OCR pattern—or else be sure to crop the edges before you run the OCR.
Something else I noticed is that if you regularly use any applications or web services that accept webcam input, leaving the Czur connected can confuse them, because they are often inclined to interpret the Czur as a webcam as well. I have to unplug the Czur from my USB when I’m using the Rabb.it webcam chat site.
The Czur application
 The scanning software has three main operation categories: “Scan,” which is used in scanning and capturing images, “Archive,” which is used in running OCR or outputting Word documents or PDFs, and “Bulk,” which is used in bulk processing of scanned images (for example, cropping the scans to chop off page numbers and headers or footers before running character recognition). “Bulk” or “Archive” operations can be run on any folder full of sequentially-named images, not just ones you’ve just scanned with the Czur.
The application interface is a little different from the interfaces Windows or OS X users have gotten used to. For example, when it comes to selecting file names to process, instead of being able to click to select or shift-click to select multiple, there is a check box to be checked by each one, as well as “Sel,” “All,” “Rev,” “L/R,” and “Undo” buttons at the bottom. It took me a little to figure out how those work, but “Sel” selects the file you’re currently on, “All” selects all,” and “Rev” reverses the selection status of all files. I’m not too sure yet what “L/R” does.
When you’re ready to run optical character recognition on what you’ve scanned, you can go to “Archive,” select which images you want to OCR, and then choose the “OCR” button at the top of the screen. You can also choose to output as an image-only PDF, a searchable PDF (which incorporates the text of any words), an OCRed Word document, or TIFF images.
Czur OCR
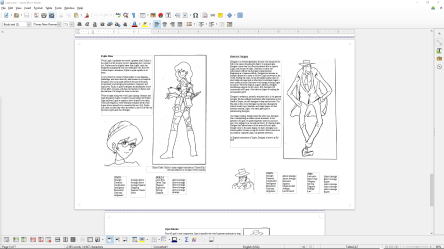
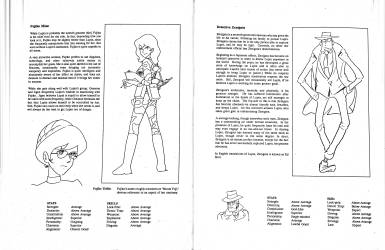 The Czur app’s optical character recognition capacity is more advanced than a lot of software I’ve seen in bygone years. Not only does it recognize the words, it also seems to recognize the font and positioning on the page, so what you get is a Word document formatted in such a way as to look like the page images you just scanned. This is most notable when you scanned a page with mixed text and images, such as this “Gamer’s Guide to Anime” a college anime fan club put out back in the ’90s. It’s not perfect, but it does a remarkably good job, on the whole, of duplicating the printed-page formatting.
 The one problem this caused for me was that, in creating ebooks out of pure text, I didn’t know how to get rid of that formatting so I could more easily the results as a single text document. One document actually ended up with all the different segments of text overlaid on top of each other while I was fiddling with it. Not sure how that happened.
 I probably could have figured out how to get rid of all that formatting segmentation if I were more conversant with LibreOffice’s more advanced functions, but in the end I settled for saving the scanned documents as RTFs so I could edit them that way, and then using Calibre to make the RTFs into EPUB and MOBI documents. If I were doing a full-length ebook, rather than just a short story or two, I could add fancier formatting via Scrivener or some other application. But for a simple proof of concept for online reading, Calibre worked well enough.
The OCR quality was actually pretty good. I only found a dozen or so errors altogether, and most of them were pretty easy to catch. The font recognition was good enough that it even recognized stretches of small-caps font in the book I scanned. However, I had to go back and change those to regular all-caps while I was editing the RTF, because small-caps text is actually all lower-case with a small-caps flag set and Calibre only saw that as lower-case when it converted to EPUB.
Czur cloud scanning via Wi-Fi
For one of the stories I converted, I tried using the Wi-Fi cloud scanning mode, instead of scanning directly into the computer. It was pretty simple, but it did require installing a Czur Cloud app on my Android phone or tablet. The app is necessary to tell the scanner exactly how to connect to Wi-Fi.
When you’re ready to connect, you use the app to pick a Wi-Fi network and enter the password, then hold the reset button on the back of the Czur scanner and tell the app to play a series of tones through the phone’s speaker to tell the scanner which network to connect to. (Apparently there was some reason they couldn’t just let the phone send that information via Bluetooth instead? Maybe a Bluetooth chip would have cost more money.) Then, once the scanner’s got a connection, you simply hold the book under it and click the button, then turn the page and click the button, and so on.
 As far as I could tell, there doesn’t seem to be a way to set the scanner to use black-and-white or greyscale via the scanner itself or mobile app, so cloud scans are color only. It takes a few seconds for the scanner to upload each picture, so if you’re scanning a very long book you should be prepared to leave it connected for a while to let the transmission complete. When it’s done, you can access the photos via your Czur cloud account, but you will have to download them to your computer and import them into the Czur application if you want to do optical character recognition on them.
When it comes to doing OCR, the good news is that whether the scan is in color or black and white doesn’t seem to matter to the application; I got just as good OCR results on the story I scanned in color as in black and white. The bad news is, the user interface for the Czur cloud service is even more clunky than the one for the PC application. It took me some fiddling around to figure out how to do a mass download of all the image scans at once.
It turned out I had to use the “share” function, then use the URL and password that generated to log in to get a mass-download option. That downloaded a zip of all the scans, which I could then unzip into a folder and import into the Czur PC application. (Which then complained about the files having nonstandardized names, but still processed them in order anyway.)
While I can’t see any reason to use the Wi-Fi scanning function if you’ve got a computer handy to plug in physically, the overall portability of the scanner means that you could effectively take it anywhere you need to do scanning work. If I were a college student working on a term paper, for example, I could see hauling it down to the college library, setting it up on a table, logging into the library Wi-Fi, and scanning relevant pages of research material out of library books. It would make a great alternative to feeding dimes into the photocopier, and would put your research material right there on your computer to work with. You could even OCR it if you needed to excerpt long passages, rather than having to retype them in.
Hail Czur!
All things considered, this is a pretty handy little scanner. While I did get it for free, I think that anyone who needs to do some serious scanning would find $399 not a bad investment at all for what you get. The software has some rough edges that could stand to be smoothed out, and it’s probably still not user-friendly enough for the average non-geek to use regularly—but it’s better than a lot of other stuff I’ve seen. And for that matter, anyone who really needs to do a lot of scanning is probably going to be geekier than average anyway.
While the Czur could be a little easier to use, I have to say that being able to scan an open book one snap at a time is definitely more convenient than trying to scan one page at a time via a face-down photocopier-style scanner. If you have some books you’d like to be able to read electronically, and it’s worth the time and effort to convert them, the Czur ET Series is probably an altogether reasonable choice.

